Hopefully you have managed to get OziExplorer3D installed, when installed correctly OziExplorer will have a new menu called "3D" will be added to its menu system.
This tutorial will guide you through some of the more common features of the software by using the supplied Demonstration data.
How OziExplorer3D works (a summary)
So you can use OziExplorer3D in two ways
Requirements
For use in this tutorial demonstration height data files and map files have been provided.
Obtaining Height Data
OziExplorer supports height data in the following formats.
For use in this tutorial example height data has been provided. To obtain and use your own height data refer to the Height Data help.
Configuration
OziExplorer
Note : you should now be working in OziExplorer not OziExplorer3D.
IMPORTANT - To make things work there are some essential elevation configuration settings in OziExplorer which must be done.
On the "3D" menu of OziExplorer, select "Elevation Configuration" to display the configuration options.
System Tab
Paths Tab

Other configuration options can be adjusted later as required by referring to the OziExplorer Elevation configuration help.
OziExplorer3D
There are no configuration settings which are essential to make OziExplorer3D work but there are settings which can be adjusted later as required by referring to the OziExplorer3D configuration help.
Toolbars
The toolbars in OziExplorer3D can be turned on and off using the option on the View menu.
Toolbars can be dragged into any position, including making multiple lines by grabbing the vertical "Bars" on the left hand side of each toolbar.
Working with the Example Data
First we will load and view a 3D map which has already been created and explore some of the features.
Load a 3D map directly into OziExplorer3D
![]() Click on the "Load
an Existing 3D Map"
button on the toolbar and using the dialog, navigate to the "3D Maps" folder,
normally
\OziExplorer\3D maps, select the Demo3D2.3d1 file from the example maps provided and press the Open button. The 3D map will be displayed in the window.
Click on the "Load
an Existing 3D Map"
button on the toolbar and using the dialog, navigate to the "3D Maps" folder,
normally
\OziExplorer\3D maps, select the Demo3D2.3d1 file from the example maps provided and press the Open button. The 3D map will be displayed in the window.
Double Click on the window caption (or press the maximize button on the caption (next to the X)), the window will be enlarged to fill the window.
Place the cursor over the map (the cursor will change to a hand), press and hold the left mouse button and drag the map to rotate the image. Release the mouse button, the map will remain in the rotated position.
Note: You will notice during the rotation the map is displayed in "wire frame" mode. This can be turned off in Configuration so that the rendered map is kept during the rotate. Rotating or moving the map with full render will require much more system performance (CPU and graphics card) so will not be useful on all systems.
Place the cursor over the map, press and hold the right mouse button and move the map to a new position. If you now use the left mouse button to rotate the map, you will notice that you now have a new rotation centre.
![]() Click the "Default
Position" button, the map will return to the default position.
Click the "Default
Position" button, the map will return to the default position.
Now we will change the way the map looks, to do this we will use the Map Control.
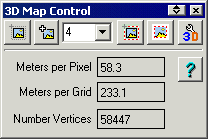
![]() Click on the "Map
Control" button to display the Map Control.
Click on the "Map
Control" button to display the Map Control.
Now that we have explored the basics of OziExplorer3D, let's create our own 3D map using OziExplorer. You can close down OziExplorer3D using the "Quit" button.
Create your own 3D map from OziExplorer
Run OziExplorer and load the map "Demo2.map". (If you are unsure of how to do this refer to the OziExplorer Tutorial).
On the "3D" menu, select "Show Elevation Control" to display elevation information. Move your cursor over the map, you should see the elevations changing in the Elevation Control as the elevation at the position under the cursor changes. If the display is "???" in the elevation control, OziExplorer cannot find elevation data at the position of the cursor. (In this case check the above configuration settings are correct and the demo height data is in the configured folder and that you have the Demo2.map loaded).
![]()
On the "3D" menu, select "3D Map Control" to display the buttons and information to help you create your 3D map. (Note: The options to select "full map" and select "a map section inside the corner markers" are disabled in the Shareware/Demo and Trial versions of OziExplorer ).
We will now create our 3D map, the steps are:
![]() Click on the
"Draw Box" button, the button will remain depressed and the cursor will change
to a cross hair. We will now select the limits of the 3D map which will be
displayed. Press and hold the cursor near the top left corner of the map and
drag the cursor to near the bottom right corner of the map and release the mouse
button. The selected area will be marked by a dotted line.
Click on the
"Draw Box" button, the button will remain depressed and the cursor will change
to a cross hair. We will now select the limits of the 3D map which will be
displayed. Press and hold the cursor near the top left corner of the map and
drag the cursor to near the bottom right corner of the map and release the mouse
button. The selected area will be marked by a dotted line.
![]() Now we will
define the size of the grid (in pixels) to be used to map the elevations. Select
the number of pixels by clicking on the down arrow and select "16", we will use a
16 pixel grid for the "Demo3D2" map. (You will learn more about what effect this
setting has on the 3D image later).
Now we will
define the size of the grid (in pixels) to be used to map the elevations. Select
the number of pixels by clicking on the down arrow and select "16", we will use a
16 pixel grid for the "Demo3D2" map. (You will learn more about what effect this
setting has on the 3D image later).
![]() Click on the
"Create Map" button, OziExplorer will begin creating your map in 3D. When
the creation is complete OziExplorer3D will be run (it is OK if it is already
running).
Click on the
"Create Map" button, OziExplorer will begin creating your map in 3D. When
the creation is complete OziExplorer3D will be run (it is OK if it is already
running).
You should now be able to see your map in 3D. It will be displayed in a window in the default position. Using your left and right mouse buttons just like you did above with the example 3D map, try: (refer above for more details on using these controls to alter your map view).
Load Waypoints and Tracks in OziExplorer3D
![]() Click on the
"Waypoint Load" button and load the waypoint file "Demo2.wpt". If you do
not see your waypoints, click on the "Show Waypoint" button.
Click on the
"Waypoint Load" button and load the waypoint file "Demo2.wpt". If you do
not see your waypoints, click on the "Show Waypoint" button.
![]() Click on the
"Track Load" button and load the track file "Demo2.plt". If you do not see
your tracks, click on the "Show Tracks" button.
Click on the
"Track Load" button and load the track file "Demo2.plt". If you do not see
your tracks, click on the "Show Tracks" button.
You can alter the way you display the objects. Click on the "Configuration"
button ![]() and the
"Waypoints" tab on the configuration window. Change the settings and click
"Save" to view the changes you have made. Any changes will be applied to the
current map and future maps, but will not alter other maps which are loaded
and the
"Waypoints" tab on the configuration window. Change the settings and click
"Save" to view the changes you have made. Any changes will be applied to the
current map and future maps, but will not alter other maps which are loaded
Refer to the OziExplorer3D configuration for details.
Saving a 3D map file to a new file name
![]() Click on the "Save 3D
Map" button. When you have selected the save location and entered a new file
name for the 3D map, click the Save button. (Do not click the Save button now
unless you want to save the image). The file extension will be (.3D1) and
this file can be re-loaded in OziExplorer3D. (Note : unless the image
is small and embedded in the 3D1 file then the image filename is stored in the
3D1 file and the image must be available to enable the 3D map to be re-loaded).
Click on the "Save 3D
Map" button. When you have selected the save location and entered a new file
name for the 3D map, click the Save button. (Do not click the Save button now
unless you want to save the image). The file extension will be (.3D1) and
this file can be re-loaded in OziExplorer3D. (Note : unless the image
is small and embedded in the 3D1 file then the image filename is stored in the
3D1 file and the image must be available to enable the 3D map to be re-loaded).
Elevation pointers
![]() Click on the
"Elevation Pointers" button. This will hide/show the 3 elevation pointers. The
elevation pointers show the positions of minimum and maximum elevations for the
map, and the other pointer shows the position at the screen centre. Press
and hold the right mouse button on the map and drag the map. As you drag the map
you will see the elevation at the position of the "screen centre pointer" will
be changing as it displays the elevation at this position. (The units the
elevation is displayed in and the pointer colors, can be
altered in Configuration).
Click on the
"Elevation Pointers" button. This will hide/show the 3 elevation pointers. The
elevation pointers show the positions of minimum and maximum elevations for the
map, and the other pointer shows the position at the screen centre. Press
and hold the right mouse button on the map and drag the map. As you drag the map
you will see the elevation at the position of the "screen centre pointer" will
be changing as it displays the elevation at this position. (The units the
elevation is displayed in and the pointer colors, can be
altered in Configuration).
Moving Map
We will now display the OziExplorer moving map position on the 3D map. To do this you must have OziExplorer and OziExplorer3D running.
If not already loaded, load the "Demo3D2.map" in OziExplorer3D and the "Demo2.map" in OziExplorer.
Follow these steps to run the moving map simulator in OziExplorer.